


Your Quick Start Guide to Online Property Measurement
Follow the five steps below to get started. Don’t forget to check out the how-to videos page if you want to learn more.
Step One: Sign In
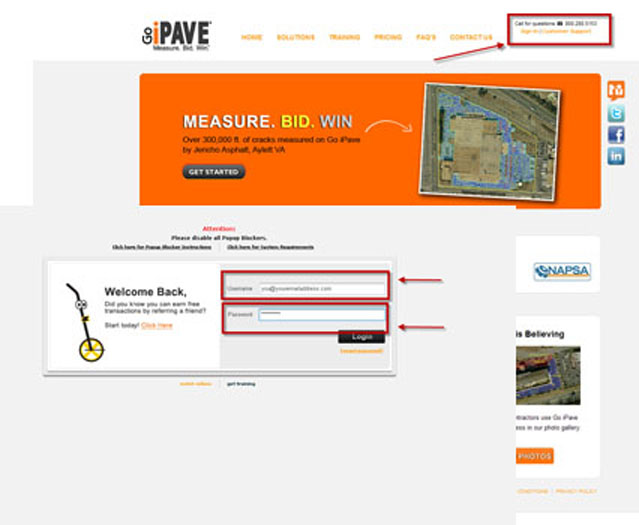
Retrieve username and password from your email receipt and go to the sign in page.
Enter your username and password on the sign in page, and login.
Step Two: Look up a Property
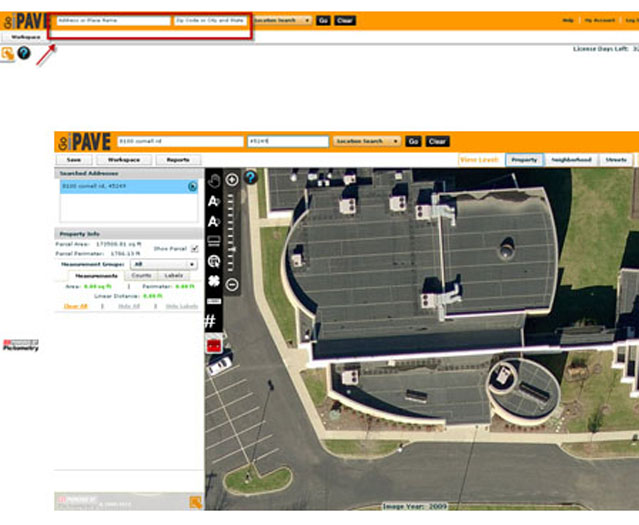
Type in an address, business name or street intersection to start.
We recommend using a mailing address with a ZIP code to locate your property.
For example, if the address for the property I want to measure is 7157 East Kemper Road, Cincinnati, Ohio 45249, I would type the address in like this:
7157 E Kemper Rd (in the box on the left that calls for address or place name)
45249 (in the box on the right that calls for ZIP code or city and state).
To see this in action, visit the How-To Videos Page and watch the “Address Searching” video.
Step Three: Measure a Property
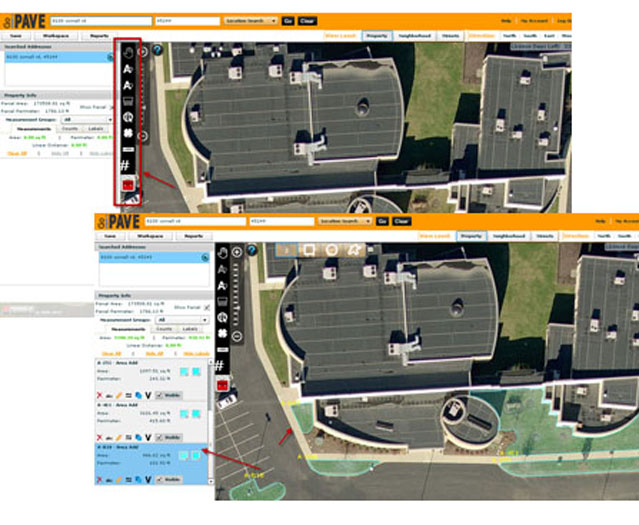
There are several tools you can use to measure properties. All tools are located on the black tool strip on the left side of the screen.
Choose the tool you would like to use and place your cursor in the photo where you would like to start your measurement.
Click once in the photo where you would like to start the measurement and begin measuring.
If you are using the area tool, your goal is to trace the perimeter of the object you are measuring. You don’t need to hold the mouse down while measuring.
Double click with your mouse when you are finished tracing the perimeter of the object, and you will have a complete measurement with result on the left side of the screen.
Take as many measurements as you want!
To see this in action, visit the How-To Videos Page and watch the “Measuring Area” video.
Step Four: Save Your Info and Photos
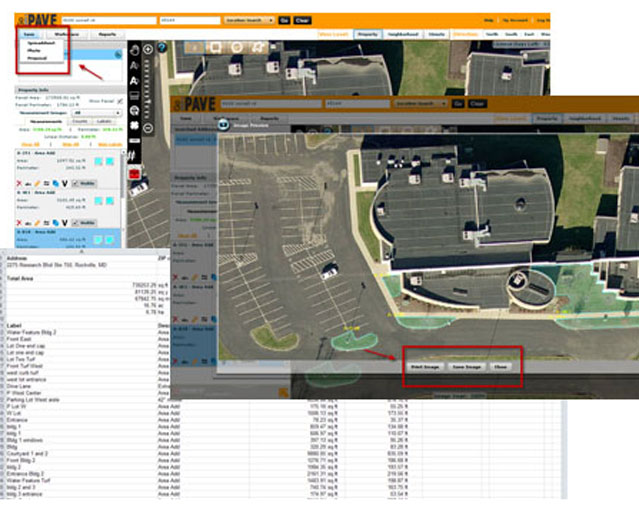
When you have finished measuring your property, click “Save” in the top left corner of the screen. A dropdown menu will appear with your saving choices.
To Save Measurements: Select “Save” then “Spreadsheet”. Be sure your pop-up blocker is off. Open the spreadsheet and take a look, or save your spreadsheet to your computer. We recommend renaming your spreadsheet when you save it.
To Save Photos: Select “Save” then “Photo”. An image preview will pop-up. Select “Save Image” at the bottom of the image preview. Rename the photo with .jpg after the name. For example, if you are going to name your photo 123 Main Street, you would name it “123 Main Street.jpg”.
To see this in action, visit the How-To Videos Page and watch the “Save to Excel” and “Save & Print Photos” videos.
Step Five: Do It All Over Again!
Once you’ve mastered these basics you’re ready to measure more properties, bid more jobs and win more sales with Go iPave’s help. If you would like further instruction on how to get started, watch the “Quick Start” video on the How-To Videos Page.